Busy Professionals' Guide to Food Photography Composition Tips for Breakfast Dishes: Elevate Your Morning with Creative Ideas and Natural Light Techniques
Mastering breakfast food photography helps busy professionals create appealing meals that boost health and productivity. By using effective composition tips, you can make your breakfast look great and inspire healthier choices. This guide shows you how to combine simple photography techniques with your morning routine, making it easy to elevate your mornings. Whether you’re snapping a quick photo or planning a more elaborate setup, these tips will help you enjoy your breakfast more.
Creating a Breakfast Food Scene: Setting the Stage for Success
Key Takeaway: A well-crafted breakfast scene makes your morning meal inviting and appealing.
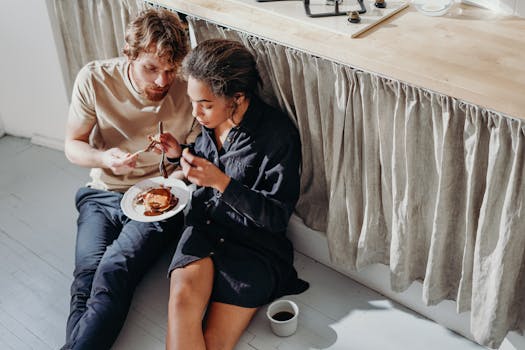
To create an inviting breakfast food scene, you need to focus on several key elements. Consider your props, background, and color palette. For busy professionals, the goal is to have a scene that looks great without taking too much time to set up.
Props: Think about using simple items like colorful plates, utensils, and napkins. You could also add a small vase with fresh flowers or a cup of coffee. These items help create a more inviting atmosphere.
Background: The right background can make a big difference. A clean, neutral surface, like a wooden table or a simple cloth, works well. Avoid clutter; a tidy space helps your food stand out.
Color Palette: Use colors that complement your food. For example, if you have a bright fruit salad, a white plate can make the colors pop.
Checklist for Essential Props
- Colorful plates and bowls
- Clean tablecloth or surface
- Fresh flowers or greenery
- Coffee or tea mugs
- Simple utensils
These elements come together to create a beautiful breakfast scene that makes your morning meal more enjoyable. (You might even find yourself wanting to take a picture for social media!)

Camera Settings for Food Photography: Capture the Beauty of Breakfast
Key Takeaway: Knowing your camera settings helps you take stunning breakfast photos.
To capture your breakfast dishes beautifully, you need to adjust your camera settings. Here are the basics to keep in mind:
- Aperture: A lower aperture (like f/2.8) creates a blurry background. This helps focus on your food. A higher aperture (like f/8) keeps everything in focus, which is great for a spread of different dishes.
- ISO: Keep your ISO low (around 100-400) for bright mornings. If it’s darker, you can increase it (up to 800), but be careful—too high can make your photos grainy.
- Shutter Speed: A faster shutter speed (like 1/250 seconds) helps freeze any movement, which is ideal for pouring syrup or sprinkling powdered sugar.
Step-by-Step Guide to Adjusting Camera Settings
- Set the aperture based on your preference for background blur.
- Adjust the ISO based on your lighting conditions.
- Choose a shutter speed that matches the action you’re capturing.
By mastering these settings, you can easily snap beautiful photos of your breakfast dishes, even on busy mornings. (Your breakfast might start feeling like a gourmet meal just from the camera’s point of view!)
Natural Light Food Photography: Harnessing Morning Light for Perfect Shots
Key Takeaway: Using natural light can dramatically improve your breakfast photos.
Natural light is one of the best tools in food photography. Morning light is soft and warm, making food look more appetizing. Here’s how to make the most of it:
Timing: Shoot your photos in the early morning. This is when the light is soft and flattering. Avoid harsh midday light, which can create unappealing shadows.
Positioning: Place your food near a window to take advantage of the light. Experiment with different angles. Side lighting can highlight textures, while backlighting can create a glow around your food.
Examples of Lighting Angles
- Side Lighting: Shows off the details and textures of your food, making it look fresh.
- Backlighting: Gives a glowing effect, perfect for drinks or dishes with sauces.
By using natural light effectively, your breakfast dishes will look more appealing. (Just be careful not to have your shadow in the shot—unless you want to start a new trend!)

Creative Breakfast Food Photography Ideas: Infuse Creativity into Your Routine
Key Takeaway: Unique ideas can make your breakfast photos pop.
To make your breakfast dishes visually engaging, think outside the box. Here are some creative ideas:
- Layering: Stack pancakes or waffles to create height and interest. Add fruits or syrups in between layers for color.
- Close-Ups: Take close shots of textures, like the fluffiness of scrambled eggs or the crispiness of bacon.
- Action Shots: Capture the moment of pouring syrup or sprinkling nuts. This brings life to your photos.
Creative Setups
- Breakfast Bowls: Arrange fruits and nuts in a colorful bowl with yogurt. This makes an inviting breakfast scene.
- Themed Breakfast: Create a theme, like a “Tropical Morning” with pineapple and coconut.
These techniques can transform your simple breakfast into a work of art. (Who knew breakfast could be so much fun? You might even want to open a cafe!)
Editing Breakfast Food Photos: Refining Your Shots for Instagram-Worthy Results
Key Takeaway: Simple editing can elevate your breakfast photos.
Editing your photos can enhance their quality without requiring professional skills. Here are some easy techniques:
- Mobile Apps: Use apps like Snapseed or VSCO. They offer filters, cropping tools, and exposure adjustments.
- Filters: Choose a filter that brightens your photos without making them look unnatural.
Short Tutorial on Mobile Editing
- Crop the photo to remove distracting elements.
- Adjust brightness to make the colors pop.
- Apply a filter that enhances the overall vibe of your breakfast.
These editing tips help you create beautiful images that are ready for social media in no time. (Your breakfast might just become the star of your Instagram feed!)

Conclusion: Elevate Your Morning Routine with Stunning Breakfast Photography
Summarize Key Points: Food photography can transform your breakfast experience.
By following these tips on creating a scene, adjusting camera settings, using natural light, being creative, and editing, you can make your breakfast visually appealing and inspire healthier choices.
Call-to-Action: Start your day with a breakfast photography session. Share your results online, and don’t forget to tag your favorite blog for a chance to be featured!
FAQs
Q: How can I effectively use natural light to enhance the mood and texture of my breakfast food photos?
A: To effectively use natural light for your breakfast food photos, position your setup near a window to take advantage of soft, diffused light during golden hour (early morning or late afternoon). Avoid harsh direct sunlight; instead, use sheer curtains to soften the light, and experiment with different angles to highlight the textures and colors of your food.
Q: What are some creative composition techniques to make my breakfast dishes stand out without making the scene look cluttered?
A: To make your breakfast dishes stand out while maintaining a clean look, focus on using contrasting colors and varied textures to create visual interest. Arrange components in a deliberate manner, such as stacking or layering items, and use garnishes like fresh herbs or edible flowers to add a pop of color without overcrowding the plate.
Q: How do I choose the right camera settings to capture the vibrant colors and details of breakfast dishes in various lighting conditions?
A: To capture vibrant colors and details of breakfast dishes, use a wide aperture (low f-stop) to create a shallow depth of field, allowing the subject to stand out. Adjust the ISO based on the lighting conditions—use a lower ISO in bright light to reduce noise and a higher ISO in dim light to maintain detail, and consider using natural light for the best color representation.
Q: Can you provide tips for editing breakfast food photos to maintain a natural look while enhancing key elements like color and contrast?
A: To maintain a natural look in breakfast food photos while enhancing key elements, use subtle adjustments to brightness and contrast to make colors pop without oversaturation. Additionally, consider slightly increasing the vibrance to enhance the food’s natural hues, and use a soft focus or vignette effect to draw attention to the main subject without making it look overly processed.